Assignment 7 - Introduction to Ray Tracing, Fall 2022
Part 1: Due Wednesday November 30, 2022 at 3:00 PM
Part 2 Due Friday Dec. 9, 2020, any time zone on Earth
Overview of Assignment
The assignment uses a new C++ code base, and also uses YAML, for the scene modeling files.
So far, all of our work in this course has been with polygonal models, which can be tidied up by shading methods such as the Phong model, but are fundamentally an approximation of some other, smoother surface.
Furthermore, we have not discussed dealing with shadows, reflections, or refractions through materials such as glass while using a tool such as OpenGL or our own shader program.
One common technique to tackle all of these issues at once, at the sacrifice of real-time speed, is what’s known as Ray Tracing.
As the name implies, this involves using Geometric Optics to trace the path that a ray of light follows to the camera as it interacts with different objects in the scene.
We’ll be using backwards ray tracing, which is the time reversal of the paths of the rays, which will start from the camera or the ”eye point” itself.
To determine where the ray interacts with a surface, we need a way to express it mathematically so that we can solve explicitly or at least approximately for their point(s) of intersection. While it’s possible to do this for the interpolated smooth surface of tessellated models, many times it turns out to be easier to use implicitly defined surfaces.
Specifically, we will be asking you to ray trace scenes composed of certain type of shapes called superquadrics, along with various light sources. Superquadrics were created in 1981 by Professor Barr.
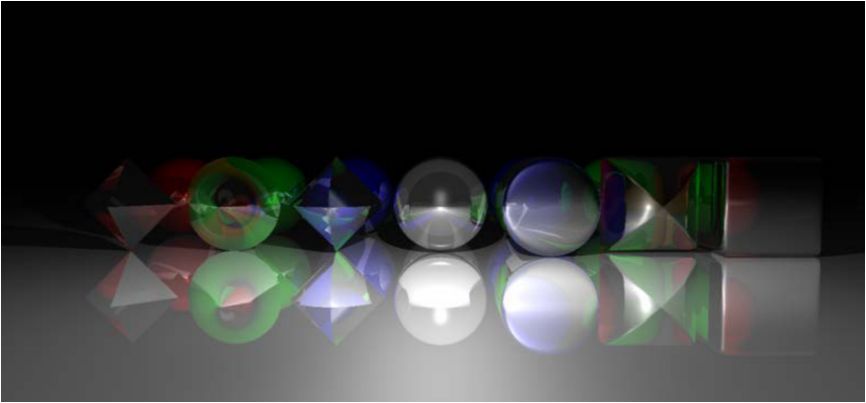
Above, Superquadric HW image by David Warrick, CS171 2014
We have provided a modeling program which includes a command line viewer. Scenes can be built out of superquadric primitives, and the program can load files specifying a series of modeling commands. You can also view the current scene, and explore it through an arcball interface and other commands.
The end goal of this assignment is to traverse the data structure provided to store objects and render the scene using ray tracing.
The assignment is broken into these two parts:
Part 1: Implement helper functions to become familiar with the math.
Part 2: Implement ray tracing functionality.
Here is a text file describing the assignment (perhaps mentioning version A again) in text form.
In Part 1, you will be focusing on becoming familiar with the necessary math and testing it to complete the task. The second part focuses on actually ray tracing the scene.
Before you begin, you may want to review the assignment material with these lecture notes, and review how to use the program we provide with these specification notes. (Please read the notes before starting the assignment!)
The files for this assignment can be downloaded here.
More in-depth details for the assignment will be given in the sections below.
Most likely, you’ll also need to first install libyaml-cpp and libpng-dev, which on Ubuntu can be installed via:
  sudo apt-get install libyaml-cpp
  sudo apt-get install libpng-dev
Once that is done, then running ”make” in the main directory should compile a version of the program called renderer, which will end up in the local bin directory.
Then, from the main directory you should be able to run the program, such as
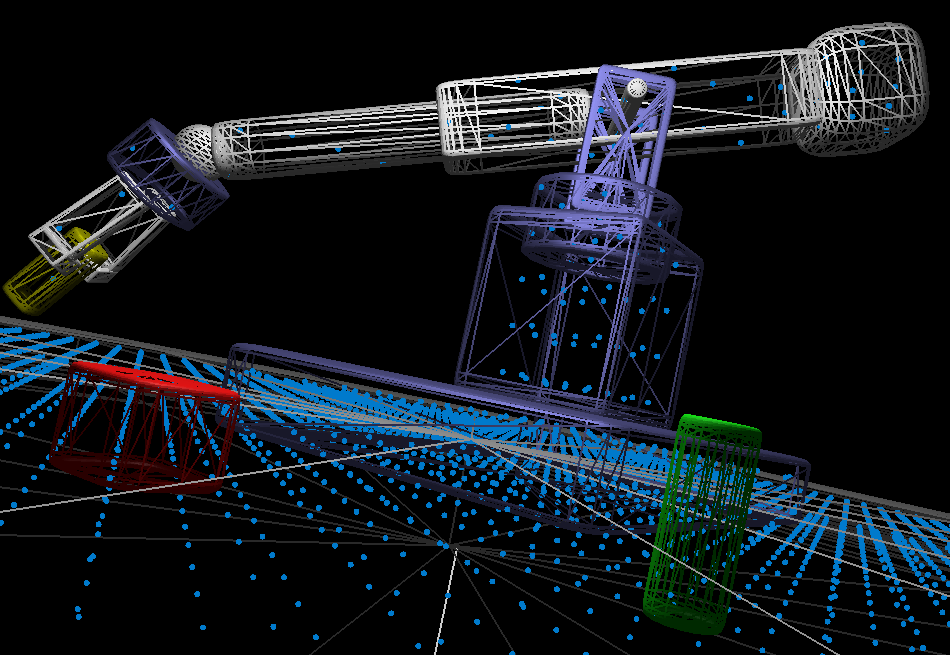
./bin/renderer 1000 1000 scenes/robot_arm.yaml
or with similar command line commands. Running the program from a different location may end up causing an error.
Renderer Controls
We are providing you with a renderer for this assignment. The keyboard controls for the renderer are as follows:
q: exits the program.
t: toggles wireframe mode (defaults to off, showing smooth surface shading).
i: toggles whether your drawIntersectTest() function is called during wireframe mode rendering (defaults to on, which does nothing at first, until you implement it). The result of drawIOTest() is at first shown only in wireframe mode.
o: toggles whether your drawIOTest() function is called during non-wireframe mode rendering (defaults to on, which does nothing at first).
r: ray traces the entities in the scene
Your Assignment, Part 1 (50 pts)
The first part of this assignment focuses on helping you get a better grasp of the renderer and the math that we will be using to ray trace a scene.
Note the use of the pair data structure class used in the source cpp files. For instance, see cplusplus.com’s documention, also Microsoft’s or Geeks for Geeks.
The first part of this assignment focuses on helping you get a better grasp of the renderer and the math that we will be using to ray trace a scene.
There are four main tasks that need to be completed for this part, as follows, and should be completed in file assignment.cpp.
(20 Points) Your first task is to modify the Superquadric::IOTest() function. Its purpose is to ensure that you understand the math behind superquadrics, and to verify that you can test a point in world space using the inside-outside function of a transformed superquadric.
What we want for you to do is to update the function IOTest() to return true if the corresponding coordinate passed is inside a superquadric and false otherwise.
This function, IOTest(), will be used for the ’i’ toggle for the inside outside function test, to show you the small spheres that are inside the collections of objects.
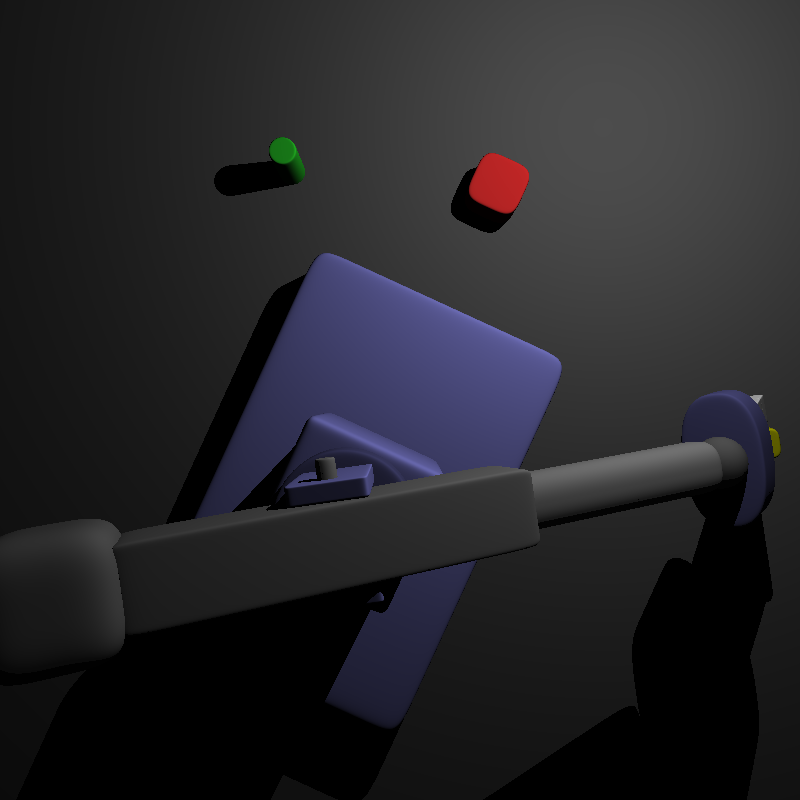
Below you can see the small spheres inside the robot arm’s superquadrics.
In principle, you should only need to change code where we have marked a TODO.
However, to make the above image, we also modified the scenes.cpp file, changing iotest_min and max, and the increment inc, to obtain more spheres to test for the robot arm image.
Remember. don’t forget to apply the correct inverse body-vs-world transformations to each point you test, as the inside-outside function assumes each superquadric is centered at the origin, in body coordinates!
(5 Points) Your second task is to modify the Assembly::IOTest() function. Its purpose is to ensure that you understand the math behind hierarchical scene formats. Since an assembly is essentially just a list of sub-objects, this is a straightforward recursive function. Make sure that you apply the assembly transformations correctly.
Once this (and the previous part) is completed, pressing ‘i‘ in the raytracer should render a set of small spheres at positions that are inside of the objects in the scene, for the wireframe view of the objects, which is toggled by inputting ’t’ to the renderer window.
It would be best to start with one or two superquadrics in a scene file, to test this, such as sphere.yaml or sphere˙cube.yaml
You may want to enlarge this sphere, since only a few points in the grid would end up inside the small sphere. Or you could also alter the scenes.cpp file, perhaps changing iotest min and max to have a larger range, while reducing the increment inc.
(20 Points) Your third task is to implement the Superquadric::ClosestIntersection() function. Its purpose is to ensure that you can intersect a ray with a superquadric, assuming the ray hits one.
Given the ray equation where is the camera position and is the direction the direction the camera is looking, then we want to be able to find the first intersection with a superquadric (if it exists).
This will be the smallest non-negative value of .
Again, don’t forget to apply each superquadric’s inverse transformations appropriately to your ray!
(5 Points) Your fourth task is to implement the Assembly::ClosestIntersection() function. Its purpose is to ensure that you can intersect a ray with a hierarchical object, assuming it hits one.
In order to intersect the above vector with an assembly, you must test if it hits each child of the assembly, and choose the intersection (if there is one) closest to the camera.
Additionally, the arcball rotation does not affect the location of the camera or light sources, just how they appear in the viewer, so you can’t currently use it to rotate the ray-traced scene.
You can type ’c’ as a toggle, to see the camera’s view of the objects or go back to the interactive views.
Part 2 of Your Assignment): (50 pts)
For this part of the assignment, you must provide an implementation of the raytrace() function, in Assignment.cpp. This function should send a ray out from the camera through each pixel in a grid of arbitrary size, and compute the lighting at its first intersection with a superquadric. The point breakdown is as follows:
(30 points) for a correct implementation of the Phong model at each ray-superquadric intersection.
(20 points) for a correct implementation of shadowing at each ray-superquadric intersection.
Since the raytracing function may take some time to complete, we require that you also provide images that you have raytraced in your submission. We will still verify and run your code, having a preliminary image helps a lot in verifying what’s wrong and helping in providing you helpful feedback.
To output the raytraced images as a PNG, to make this easier, we’ve provided an Image class.
You can set the color of pixel using the SetPixel() method, which takes two ints representing the x and y indices of the pixel, and three floats in the range [0,1] representing the red, green, and blue intensities for the pixel.
We’ve provided this class to let you more easily store and manipulate the grid of pixels composing your image, in addition to automatically writing the result to a file called rt.png , once the raytrace() function returns.
The code contains a simple example of its usage, looping through the entire grid and coloring it entirely white.
Again, you’ll have needed to make sure the libpng library is installed, which you can do on Ubuntu with
sudo apt-get install libpng-dev
Since the Raytrace() function is a member function of the Scene class, it can use all of the member variables of the Scene class defined in scene.cpp. The Scene::ClosestIntersection function will be very useful.
Note that because the lecture note derivation of the ray equation assumes (0,0) to be in the lower left corner of the screen, so does the Image class.
The size of the output image is currently set to 500x500 using a few defines at the top of the file, but you are free to set the resolution to whatever you desire. Just be aware that ray tracing takes a very long time, so you’ll probably want to test your code with smaller images before.
Finally, because the ray tracing process can take such a long time, we spawn it in a separate thread that runs in the background while the rest of the program continues executing as usual.
What to Submit
Before submitting, please comment your code clearly and appropriately, making sure to give details regarding any non-trivial parts of your program.
Submit a .zip or .tar.gz file containing all the files that we would need to compile, run, and test your program. In addition, please submit in the .zip or .tar.gz a README with instructions on how to compile and execute your program as well as any comments and information that you would like us to know.
We ask that you name your .zip or .tar.gz file lastname_firstname_hw7.zip or lastname_firstname_hw7.tar.gz respectively, where you replace the “firstname” and “lastname” fields with your actual first and last name.
Please submit your zip or tar.gz to Canvas in the two areas for Assignment 7.
Original written by Parker Won and Nailen Matschke (Class of 2017).
Modified and adapted by Lokbondo (Loko) Kung (Class of 2018).
2020 version by Ethan Jaszewski and Al Barr.
Links: Home Assignments Contacts Policies Resources