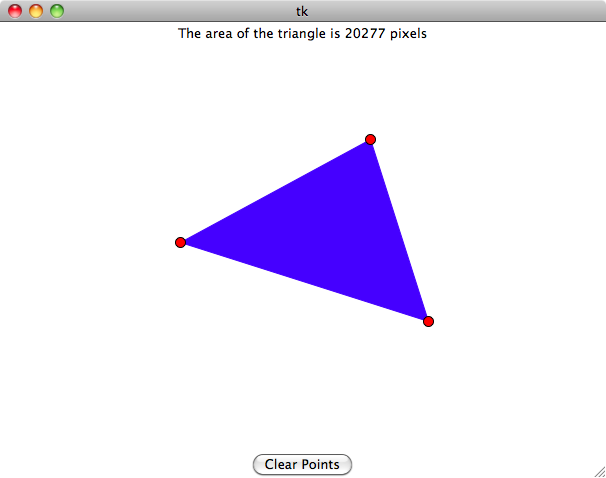
In this assignment you will construct a simple Tkinter program that displays the area of a triangle selected by the user. The user interface will look something like this:
Complete your work for this assignment in the file heron.py, and submit
this file via csman when you are finished.
Make sure to write clear and complete docstrings for all functions you create in
this assignment.
In your program, you will represent a point as a tuple of two numbers. So here are examples of points:
  (0, 0)
  (34, 57)
  (141, 271)
The first element of the tuple will be the X coordinate of the point, and the
second will be the Y coordinate. You can use the square bracket notation on
tuples just like with lists and strings (tuples are sequences), so if a point is
p = (34, 57), then the X coordinate is p[0] and the Y coordinate is
p[1]. In this assignment, the numbers will be integers because they
correspond to pixel values in a Tkinter canvas.
You will need to define a function called distance(p1, p2) which computes
and returns the distance between the points p1 and p2. (This function will
require the math.sqrt function.)
Here are some examples of it at work:
  >>> p1 = (3, 4)
  >>> p2 = (6, 8)
  >>> distance(p1, p2)
  5.0
  >>> distance(p2, p1)  # They'd better be the same...
  5.0
Next, you should define a function called compute_triangle_area(p1, p2,
p3) which uses Heron's formula to find the area of the triangle specified by
the three points. Heron's formula is a clever little formula to find the area
of a triangle specified by its three points. (You can read about Heron's formula
here.) Note that Heron's
formula works fine if two or more points are the same; it will simply return an
area of 0, as it should.
You can test your function like this:
  >>> p1 = (10, 6)
  >>> p2 = (7, 15)
  >>> p3 = (12, 14)
  >>> compute_triangle_area(p1, p2, p3)
  21.0
  >>> compute_triangle_area(p1, p1, p2)
  0.0
  >>> compute_triangle_area(p1, p1, p1)
  0.0
Make sure that these two functions are working properly before you attempt the rest of the assignment! Test them using WingIDE or from the command prompt by typing:
python -i heron.py
and running the above examples manually.
Next you will construct a basic user interface for this program using Tkinter.
Normally, in Python programs that define user interfaces, the user interface is specified as one or more Python classes, which are user-definable object types. However, since we haven't covered classes in the lectures, we'll keep it simple here and define the user interface in terms of functions and some initialization code that will exist outside of any function. We'll start by describing the initialization code, which you should put at the end of your program. (You don't have to put it there, but your program will be much easier to read and understand if you do.)
Initialize Tkinter by creating the root window as follows:
root = Tk()
Next we need to set up the state for the application. In computer programming, the word state refers to the variables that contain data that changes as the program runs. Here, this includes two global variables:
StringVar to hold the text for the label at the top of the GUI (see
below).Setting this up only requires a couple of lines of code.
Then we need to create the GUI widgets we will need for our program. They will include:
Use a grid layout manager to place the widgets on the window. The grid will
be very simple: 3 rows and 1 column. Use the grid method of the label,
canvas and button objects to specify their positions on the grid. Put the label
in row 0, the canvas in row 1, and the button in row 2. The label needs to use
the StringVar for its text; this can be done by specifying the
textvariable option when constructing the label. Also, set the button's text
to "Clear Points" or something like that.
The canvas will bind a left mouse button click (<Button-1>) to an
event-handling function called handle_click, described below. Clicking on
the button at the bottom of the window will call a function called do_clear,
also to be described below (see lecture 13 for how to assign a function as the
command to be executed when a button is clicked).
After all this is done, initialize the user interface state by calling a
function called update_ui_state, also to be described below. Once this is
done, the user interface is set up. Add a call to the root.mainloop() method
and the program can now be run. To exit the program, close the window.
By this time, you've done everything except define these functions:
handle_clickdo_clearupdate_ui_stateWe'll define the first two functions, which are event-handling functions, in
the next section. We'll define update_ui_state after that. For now, write
stub versions of these functions as follows:
def handle_click(event):
    pass

def do_clear():
    pass

def update_ui_state()
    pass
A stub function is a function with an empty body. It's there to allow the
program to be tested even though major pieces haven't been implemented yet. In
this case, if the user clicks on the canvas, the handle_click event-handling
function will be called, which will currently do nothing (because of the
pass statement). Similarly, clicking on the button will call the do_clear
function which will also do nothing. We will replace the pass statements
with working code below, but having stub functions like these at least allows us
to run our program and test that the user interface looks the way we want it to
look.
NOTE: Don't put the stub functions after the call to root.mainloop()!
The call to root.mainloop() has to be the last line in the program, because
once it executes, the program will run until the window is manually closed.
After you have created these steps, you should be able to get a basic view of your application by doing this:
python heron.py
If you've set up the GUI code as we've described above, your new user interface should pop up! It may be a little sparse at the moment, but we will solve that next. Close the window to exit the program.
Next you need to start handling events from user interactions. You have two operations to handle: the user clicking in the canvas, and the user clicking on the "Clear Points" button.
First, write the handle_click function for handling mouse-click events on
the canvas. This function will need to do the following things:
global statement (see lecture 12 for details).update_ui_state function, described below.Once you've added this code, make sure to remove the pass statement that
was in the stub version before, since it's not needed anymore.
Make sure that the handle_click function has been attached to the canvas
to handle left mouse-clicks (we mentioned this above). You'll need to call the
canvas' bind method, binding the '<Button-1>' event type.
Next, write the do_clear function that clears the application's (global)
list of points, then calls update_ui_state. Make sure that the clear button
calls do_clear when the button is clicked. This is kind of like using the
bind method, but you don't have to use bind; see lecture 13 for details.
Again, don't forget to remove the pass statement you put there before when
you wrote the stub function. The final version of your code shouldn't have any
pass statements.
Now you are down to the last function to write! This function is the
update_ui_state function referred to above. It is responsible for updating
the text in the label at the top of the UI, and also for drawing the points of
the triangle. Here is how the label should be managed:
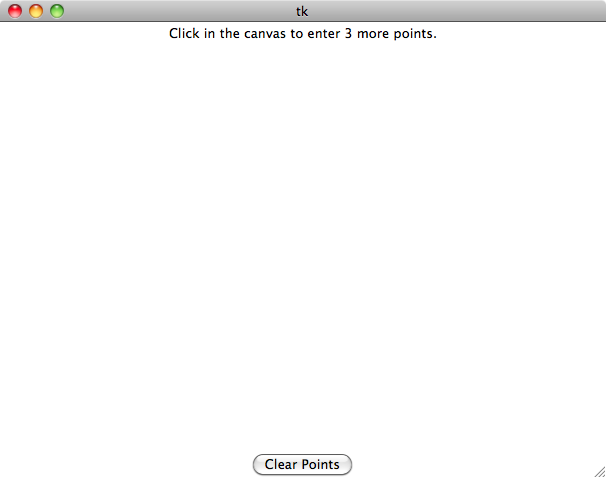
If the current number of points is less than three, the label should say something like, "Click in the canvas to enter N more points." where N is 3 minus the length of the list of points.
Otherwise, if the current number of points is exactly three, the label should
say something like, "The area of the triangle is A pixels." where A is the
result of your compute_triangle_area function applied to the points that were
entered.
It should not be possible to have more than three points in the list; this
would be a good thing to assert!
The canvas will be a bit more complicated to update. Regardless of the
initial state of the canvas, the update_ui_state function should first clear
the canvas of any current content. That can be done with these lines of code:
    for id in canvas.find_all():
        canvas.delete(id)
The find_all method of the canvas object finds all the items on the canvas
and deletes them. (You may need to change the name canvas if you called your
canvas something else.) This code should be called at the start of
update_ui_state.
Next, the canvas should be updated like this:
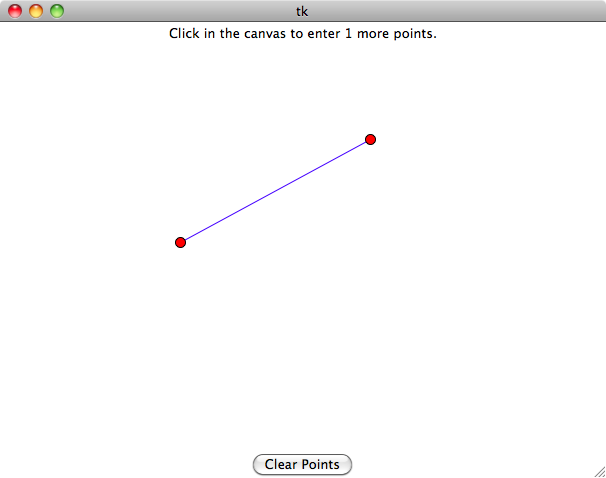
If there are two points, draw a blue line between them. Otherwise, if there are three points, draw a filled blue polygon between all three points. The outline should be blue for the polygon.
Finally, draw a small filled red circle centered at each point. The circle should be 10 pixels in diameter, and should have a black outline.
Note that the line/polygon should be drawn before the circles, so that the circles always show up on top.
To make sure this is perfectly clear, here is a sequence of interactions with the application. Before anything is clicked, the user interface looks like this:
After one point has been selected, it looks like this:

Notice that the label has been updated to indicate how many points remain.
After two points have been clicked, the UI will look like this:
And, after a third point has been clicked, the UI looks like this.
At this point, no more button-clicks should be recorded, at least not until the "Clear Points" button is clicked to reset the user interface. Then, it should go back to the first picture in this sequence.
Here are a few things you need to keep in mind as you write the code for this assignment:
Do not use the pack method on the graphical objects (also known as
widgets). If you use the grid method, the pack method is not necessary
and may cause problems. Both pack and grid are examples of what is called
layout managers, and there should be only one layout manager being used for
any widget.
Make sure that every widget has the root window as its parent.
Don't specify the geometry of the root window. It isn't necessary, because Tkinter will expand it to fit the widgets that go inside it. Setting the geometry explicitly can cause problems because there may not be enough space to place all the widgets.
At this point, you should be able to run your GUI by typing this at the command prompt:
python heron.py
When you type the last line, your application should start up.
After everything is working properly, submit your heron.py file via
csman.